
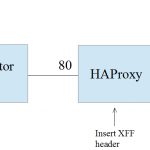
When using proxies such as STunnel and HAProxy it’s easy to loose track of the client source IP address. This occurs for example when HAProxy is used in it’s default configuration to load balance a number of back-end web servers. By default, the source IP address of the packet reaching the web servers is the IP address of the load balancer and not the IP address of the client. One way around this is to enable X-Forward-For headers for HAProxy (the default for Loadbalancer.org appliances) and configure the web servers to track the IP address in this header. For more details on enabling this for IIS and Apache web servers, please see IIS and X-Forwarded-For Headers and Apache and X-Forwarded-For Headers.
For more complicated scenarios where SSL termination is also required on the load balancer and the original source IP address is still required, additional steps are needed.
STunnel & Haproxy

By default, in the above example the IP address in the X-Forward-For header reaching the Web Servers is the load balancers own IP address. This is because STunnel is not transparent be default. To force STunnel to pass the original client IP the Protocol directive in STunnel must be added and set to proxy as shown below:
[STunnel]
cert = /etc/loadbalancer.org/certs/STunnel.pem
ciphers = ALL
accept = 192.168.10.10:443
connect = 192.168.10.10:80
options = NO_SSLv2
options = CIPHER_SERVER_PREFERENCE
protocol = proxy
TIMEOUTclose = 0
N.B. For more details on the protocol option please refer to this page.
This enables STunnel to pass the original client IP address to HAProxy.
HAProxy must also be configured to accept and use this information by inserting the accept-proxy & option forwardfor directives:
listen L7-VIP
bind 192.168.10.10:80 transparent accept-proxy
mode http
balance leastconn
cookie SERVERID insert nocache indirect
server backup 127.0.0.1:9081 backup non-stick
option http-keep-alive
option forwardfor
option redispatch
option abortonclose
maxconn 40000
server WEB1 192.168.10.11:80 weight 100 check inter 6000 rise 2 fall 3 minconn 0 maxconn 0 on-marked-down shutdown-sessions
server WEB2 192.168.10.12:80 weight 100 check inter 6000 rise 2 fall 3 minconn 0 maxconn 0 on-marked-down shutdown-sessions
server WEB3 192.168.10.13:80 weight 100 check inter 6000 rise 2 fall 3 minconn 0 maxconn 0 on-marked-down shutdown-sessions
N.B. For more details on the accept-proxy option please refer to this page , for more details on the proxy protocol please refer to this page.
Fortunately, STunnel & HAProxy can easily be configured in this way using the built-in Web User Interface:
a) Configuring STunnel
Using the WUI option: Cluster Configuration > SSL Terminaton click [Modify] next to the relevant STunnel Virtual Service and enable the option Set as Transparent Proxy as shown below:
![]()
b) Configuring HAProxy
Using the WUI option: Cluster Configuration > Layer 7 – Virtual Services click [Modify] next to the relevant HAProxy Virtual Service and enable the options Set X-Forward-for Header (enabled by default) and Proxy Protocol as shown below:

c) Restart Services
Finally, restart STunnel and HAProxy to apply the changes using the restart buttons that appear at the top of the screen as shown below:

As mentioned at the start you’ll also need to ensure that your web servers are correctly configured to log the X-Forward-For header details, but as far as configuring the load balancer is concerned, that’s it !
You Can Learn More About the LoadBalancer.org’s Product Line By Going to www.LoadBalancerSolutions.com/LoadBalancer-org
The original article/video can be found at Source IP Addresses, STunnel, Haproxy and Server Logs